Sun Porch Ketra Showroom
Blueboard & Plaster Phase
Everything the carpentry, drywall, and plaster crews need to set every Ketra aperture, invisible speaker, pendant box, and cove wire dead flush with the finished plaster — the first time.
One ceiling, four trades, zero rework
This room is roughed in and ready for blueboard. All Ketra D2 housings, the Stealth visible and invisible speakers, and the subwoofers are already mounted. Work top to bottom. Anything marked field-verify gets confirmed against the room and the Foreman 5.28.26 plan before you cut. When in doubt, stop and call the office.
The four golden rules
If you remember nothing else from this page, remember these. Every detail below flows from them.
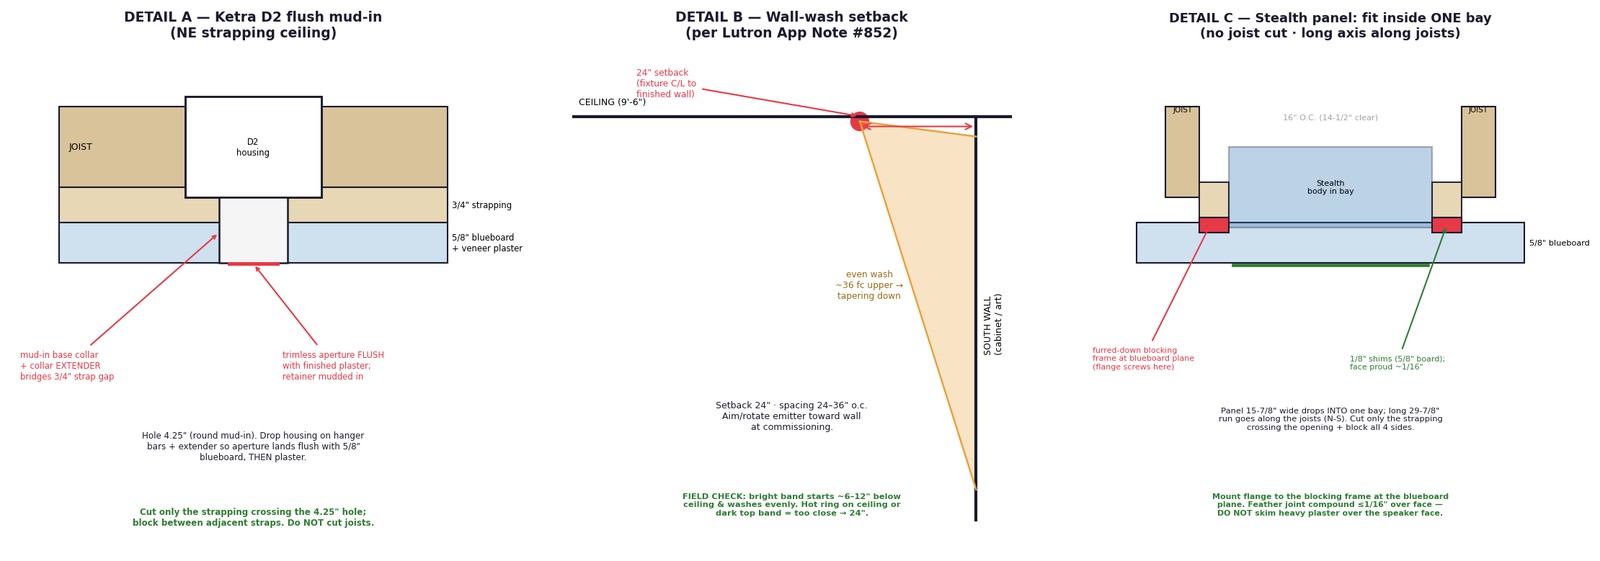
Measure to the finished ceiling, not the joists
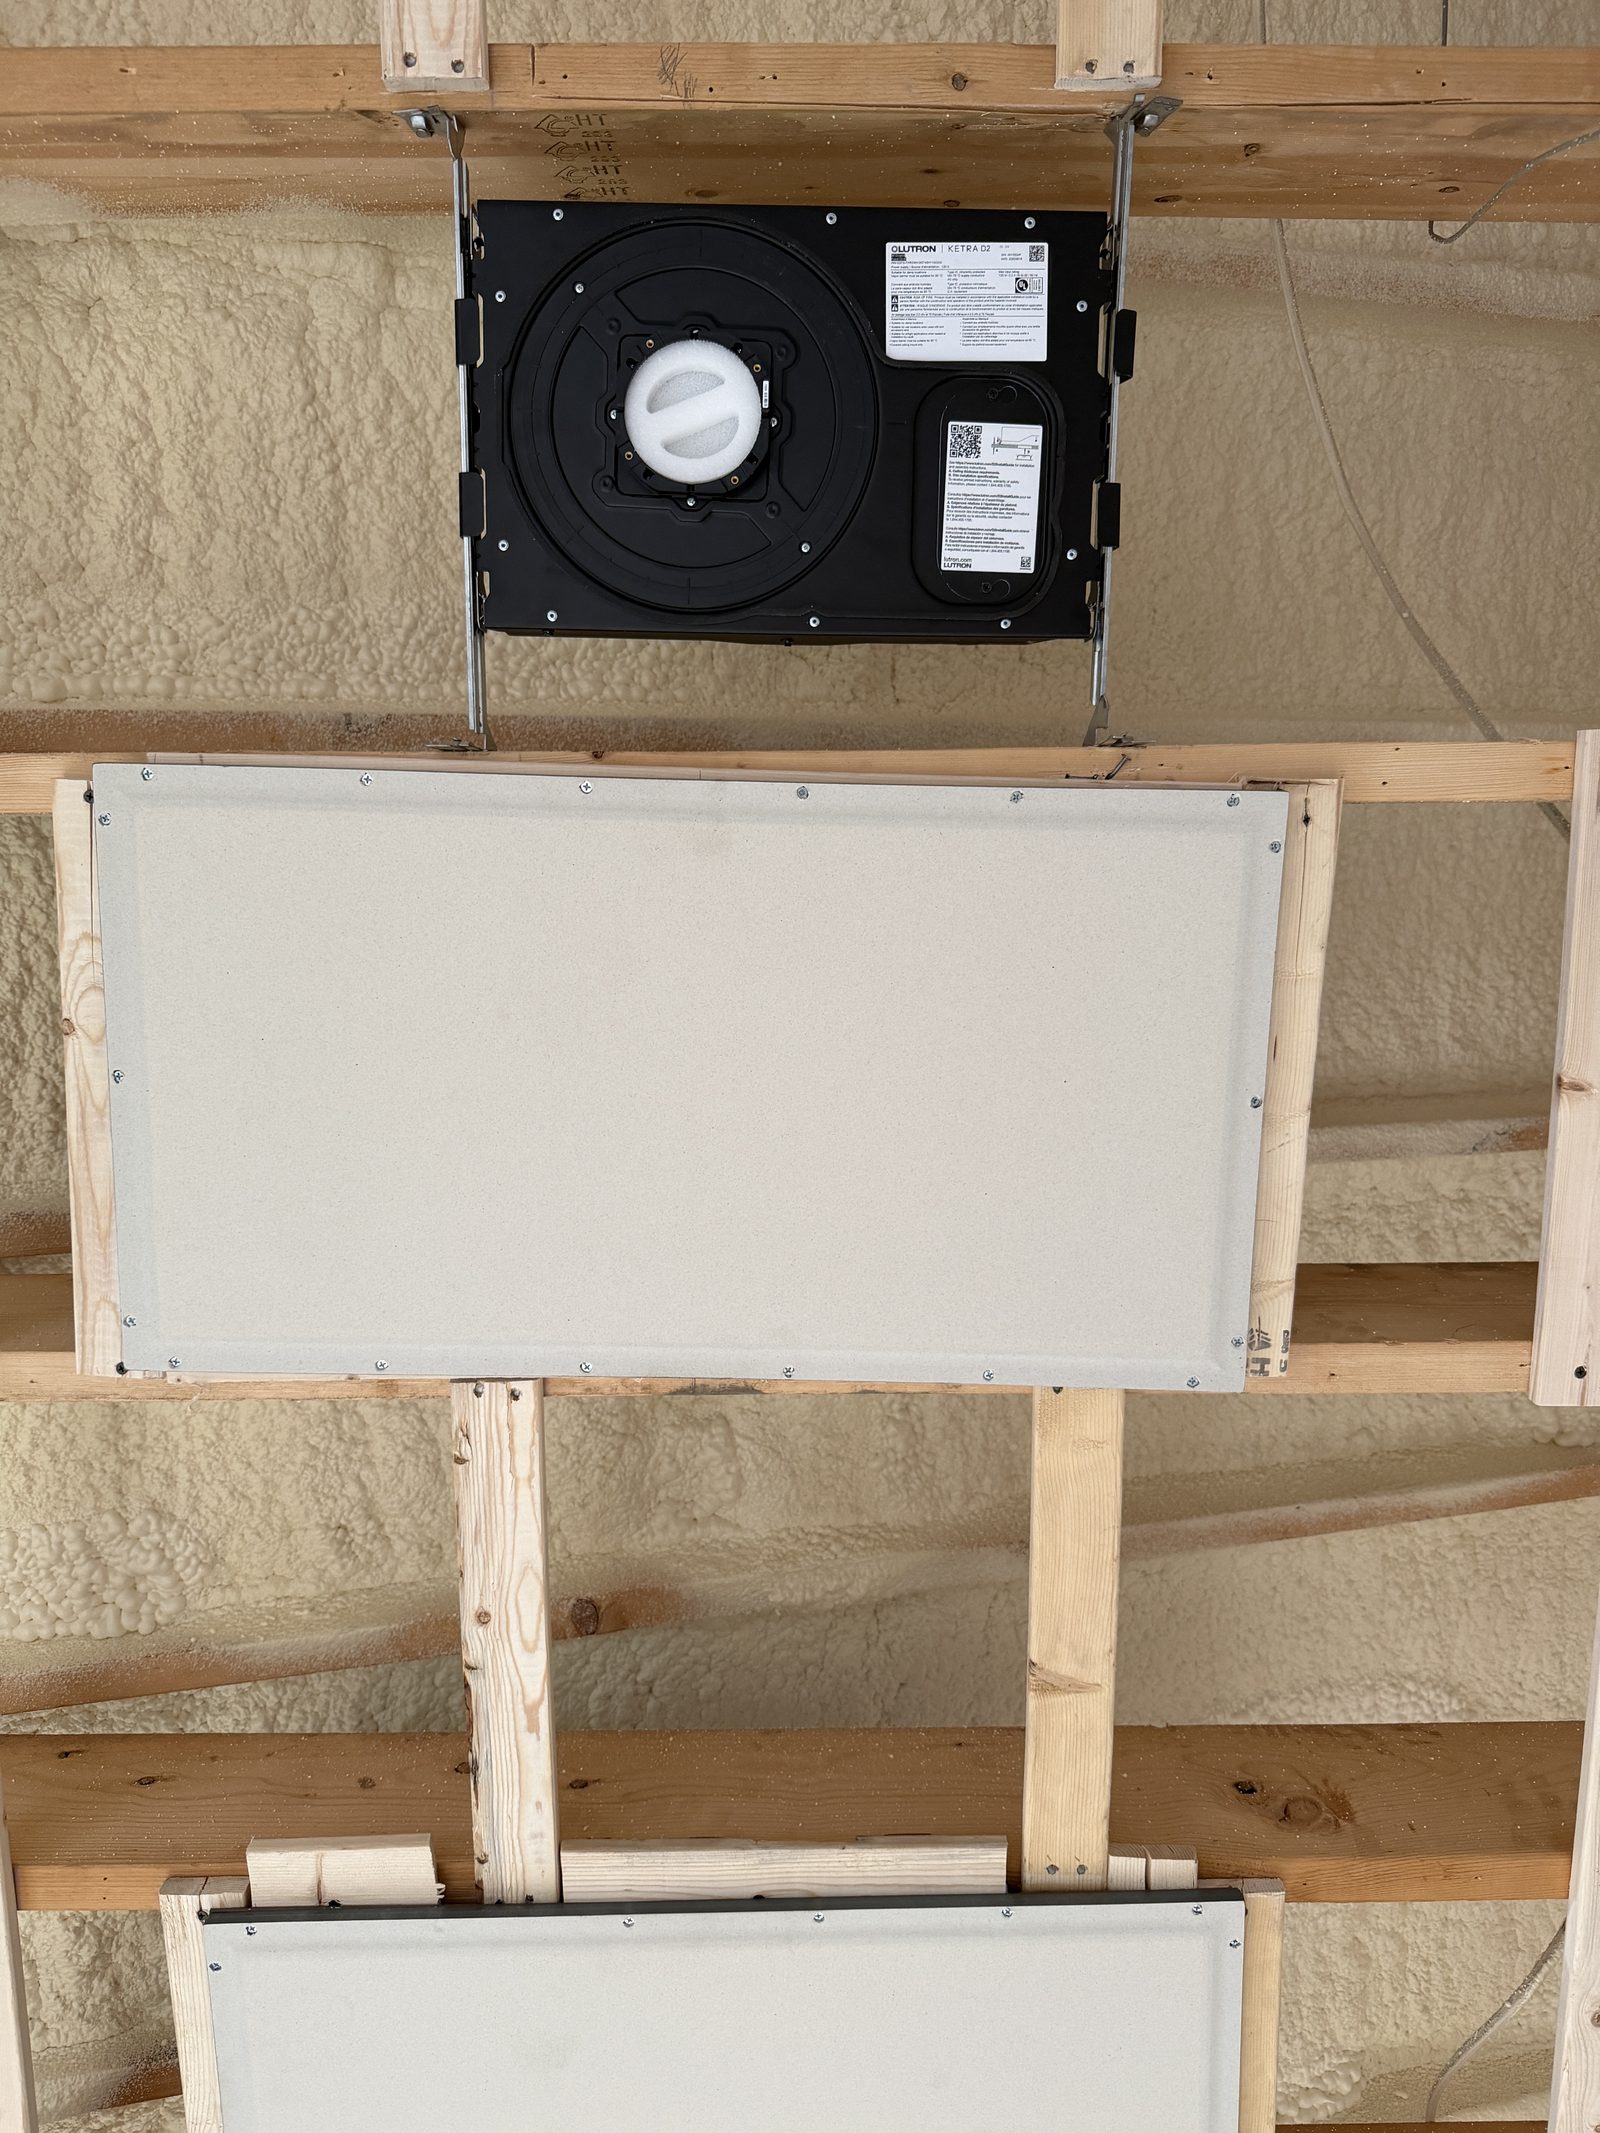
The reference plane is the bottom of the 5/8" blueboard + plaster. Because we strap, that plane sits ~1-3/8" below the joist bottoms (3/4" strapping + 5/8" board). Every aperture and speaker face is set to that lower plane.
Cut the minimum strapping, then block it
Cut a strap only where it physically crosses a hole or opening. Header the cut ends with short 1×3 blocking to the neighboring straps so the blueboard stays fully supported — no unsupported edges around any penetration.
Check flush before the plasterer touches it
Once blueboard is up you can't easily move a housing or speaker. Verify flush with a 4-ft straightedge across every aperture and panel before plaster — proud lip or recess both fail.
Ketra power is constant — never switched
All Ketra line-voltage loads are on one constant-hot circuit. No wall switch, no line-voltage dimmer on the Ketra circuit — control is wireless. A switched or dimmed feed breaks the system.
Four changes from the lighting RCP (Rev 07)
The crew may be holding the earlier RCP. Where it disagrees with these, these win.
TV lift removed
The Future Automation CHR6 ceiling TV lift is out. Do NOT cut joists 7–11 and do NOT build the doubled trimmers or headers. Framing stays intact except minor per-fixture strapping cuts.
Adjustable downlight centered
With the TV gone, the Ketra D2 Adjustable now centers on the room — about 143-1/2" from the kitchen wall, on the centerline, over the coffee table. Aim it straight down.
Cabinet lighting — Option 1 confirmed
We are building Option 1: two ceiling wall-washers over the cabinet (no sconces). Four ceiling wall-washes total. Ignore the Option-2 sconce note in the old SOW.
Bosch cassette in bay 2
A Bosch 12k one-way ceiling cassette is reserved for bay 2 (between joists 2 & 3 from the kitchen end). Keep all lighting, speakers, and blocking clear of bay 2.
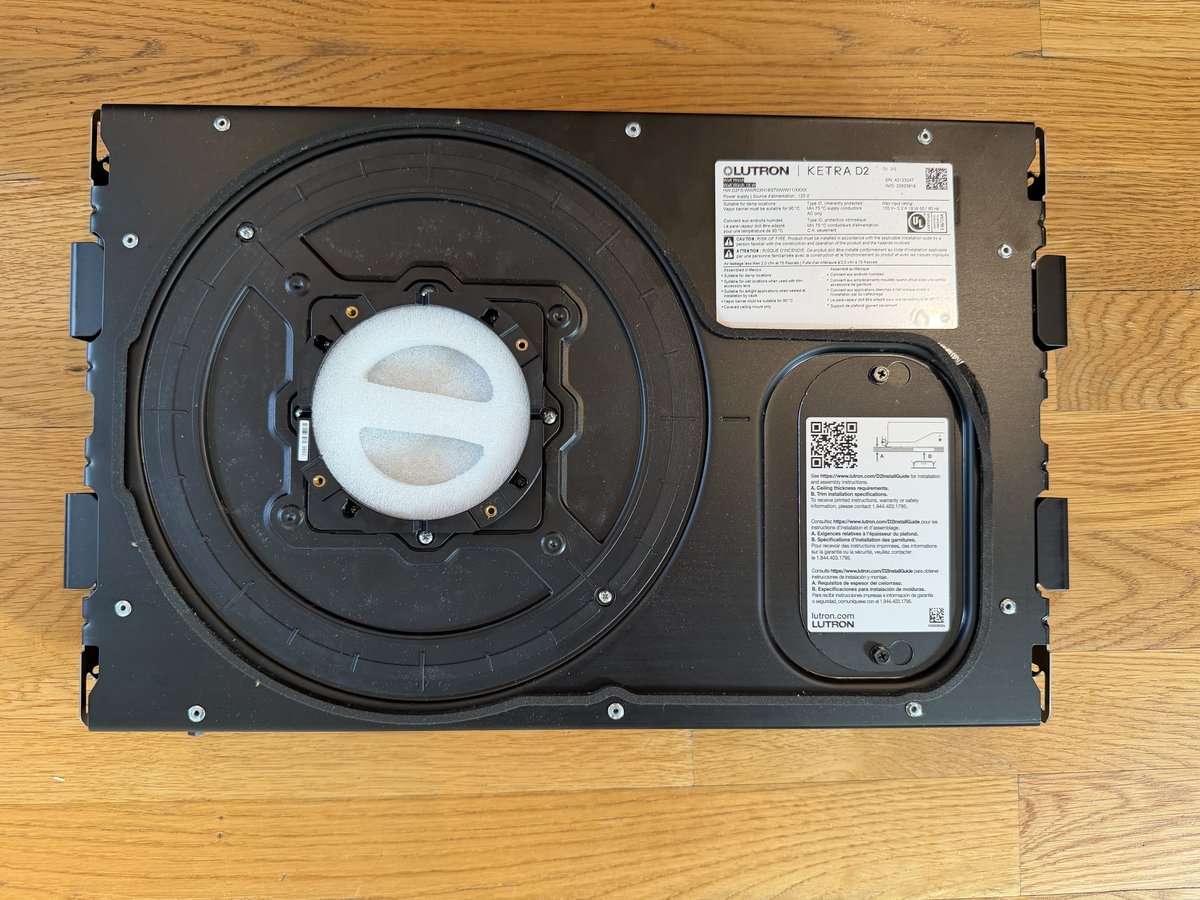
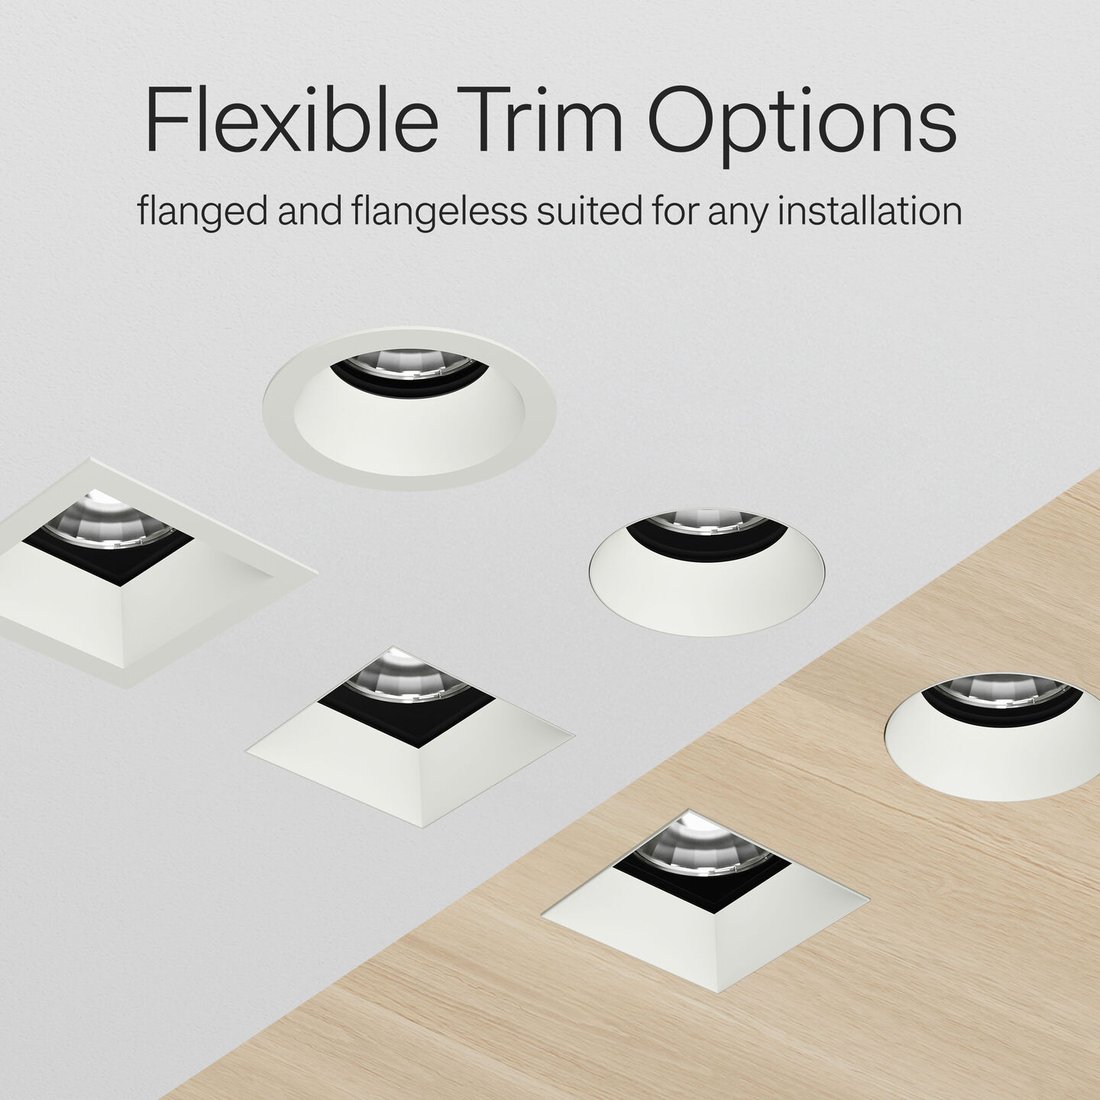
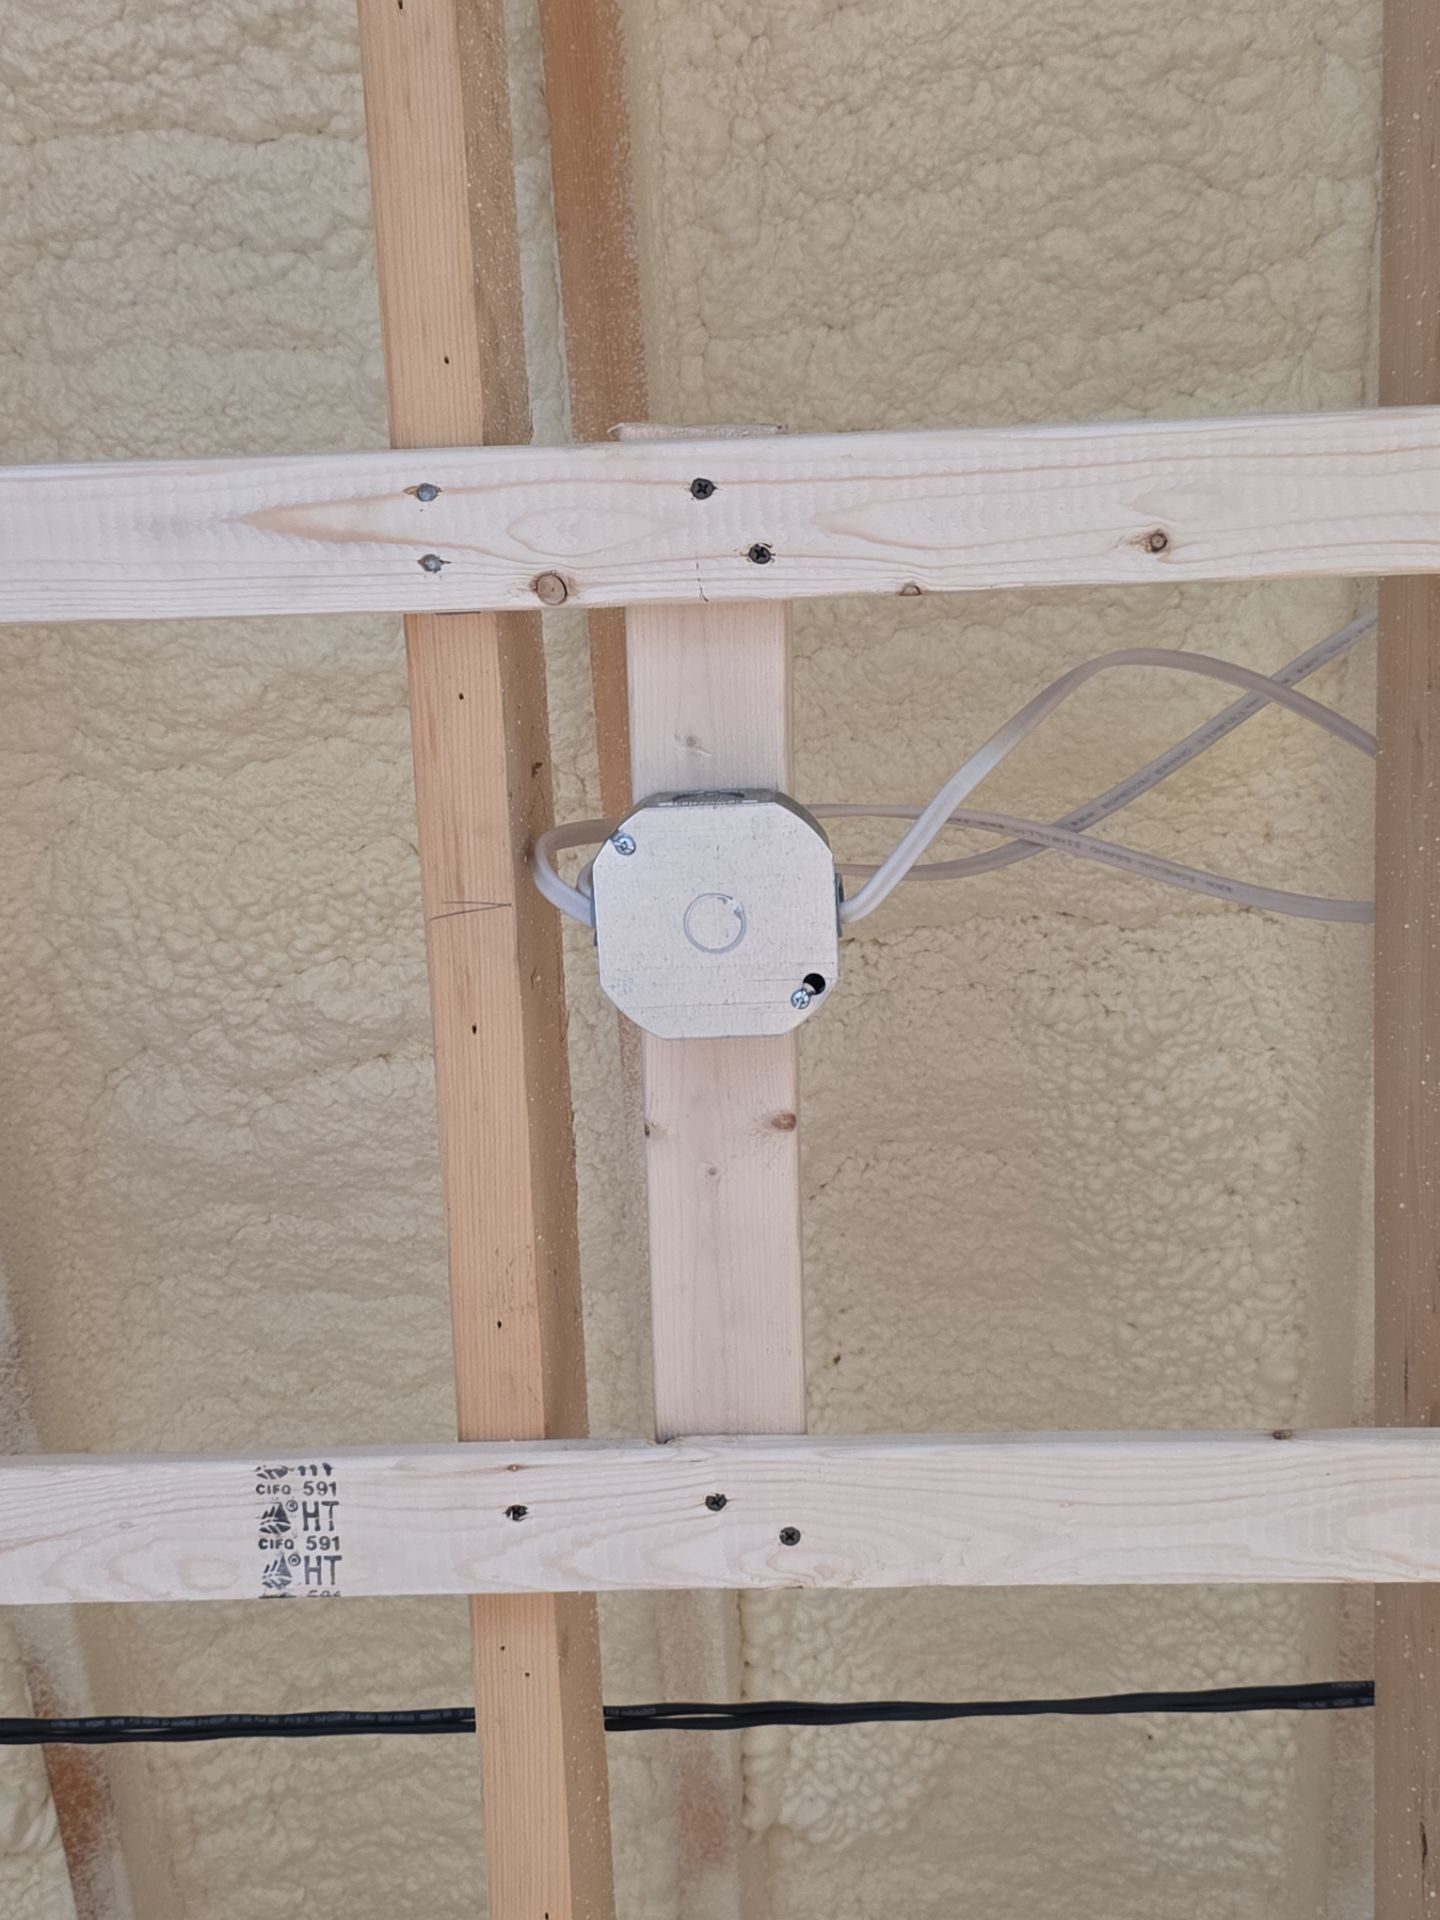
Ketra D2 downlights — the flush mud-in
Every D2 (2 fixed + 1 adjustable + 4 wall-wash) uses the round flangeless mud-in trim in white, so the aperture finishes invisibly in the plaster. The single most important move: drop the aperture down through the strapping gap until it lands flush with the underside of the blueboard.
Confirm center, cut & block strapping
Mark the fixture center from the schedule. Cut the strap only where it crosses the 4.25" aperture, then header the cut ends to the flanking straps.
Mount the housing on its hanger bars
Span the adjustable hanger bars across the two adjacent joists, centered on the mark. Housings fasten to the joists.
Drop to the finished plane
Lower the housing on the hanger-bar slots and add the mud-in collar extender so the aperture/retainer ring reaches down through the 3/4" strapping gap and lands flush with the underside of the 5/8" blueboard. This is the make-or-break step.
Cut the drywall circle & expose the brass inserts
After blueboard is hung, cut the circle at each housing so the brass threaded screw inserts are exposed (see the "no plate" photo). Then drop the white mud-in plate in so it sits against the drywall surface and thread it to the inserts.
Verify flush, then plaster
Straightedge the retainer ring to the board. The plasterer mud-ins / feathers the trimless plate flush. Re-check across the ceiling — no proud lip, no recess.
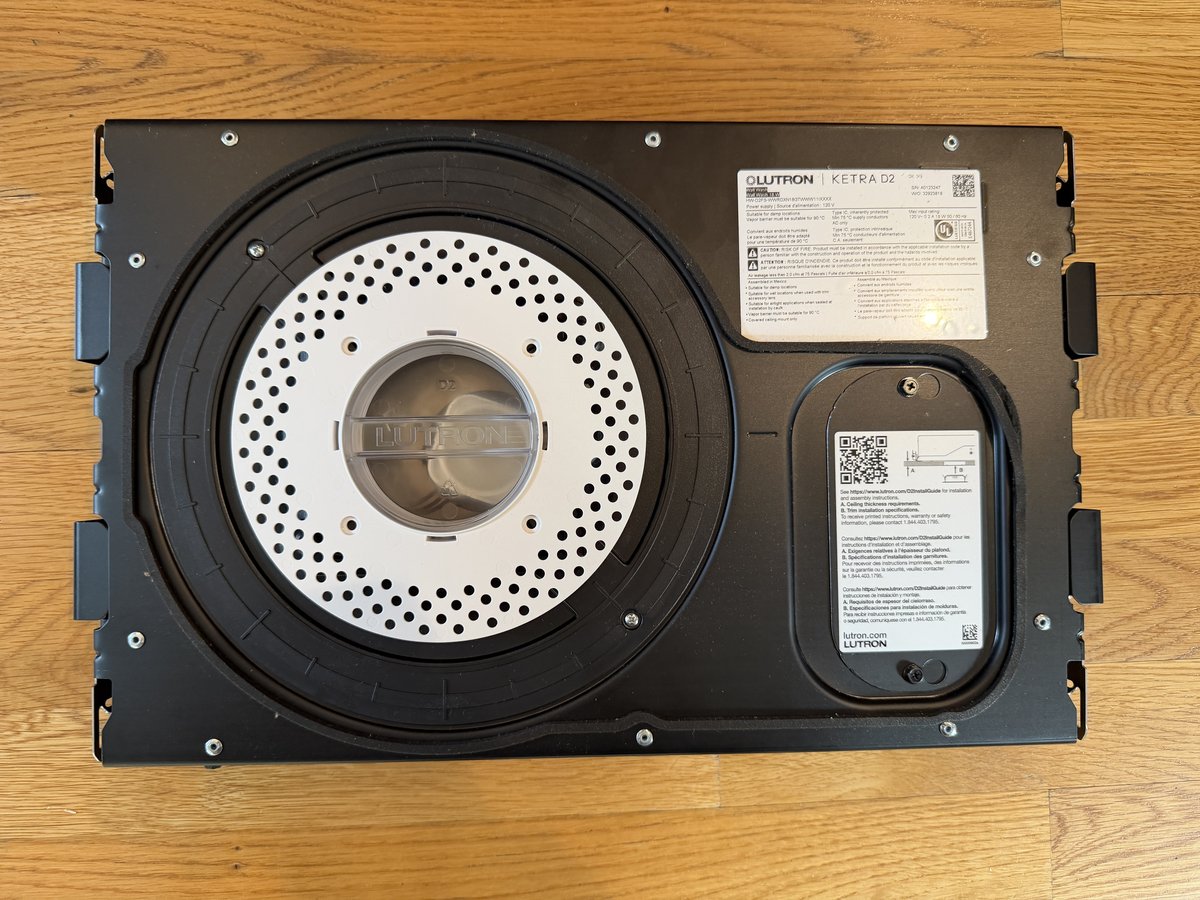
The aperture must finish flush with the PLASTER — not the strapping
If you set the housing to the joist bottoms it will sit 3/4" too high and recess the aperture. Always drop with the collar extender to the blueboard plane.
Stealth invisible speakers — flush mount & thin plaster
Two invisible mains (LR430) and two invisible subs (LR30W) — identical panels, identical install. The panel face becomes the wall/ceiling; the only thing that ruins it is too much plaster.
Orient inside one bay — never cut joists
Turn the panel so its 15-7/8" width drops into a single bay (14-1/2" clear) and the 29-7/8" length runs N–S along the joists. Cut only the E–W strapping where it crosses the opening.
Build a blocking frame at the finished plane
1× blocking on all four sides of the opening, furred down to the strapping/blueboard plane, including ledger blocking on the lower inside faces of the flanking joists. The flange screws to this frame, not the joist bottoms.
Shim for the 5/8" board
Apply the supplied 1/8" perimeter shims behind the flange so it finishes flush with the blueboard and the speaker face sits ~1/16" proud (giving the tape a recess).
Wire, screw, and test before finishing
Connect speaker wire (polarity correct), screw the flange to the blocking with the provided screws — all screws, no nails. Then play pink noise / music through the amp at the panel before any plaster and fix any rattle now.
Plaster rule — brief the plasterer specifically
Feather joint compound ≤ 1/16" over the face, fanning out 16–20". Do NOT skim heavy veneer plaster over the speaker face — more than 1/16" of material kills the sound. The face should read ~1/16" proud and even on a 4-ft straightedge.
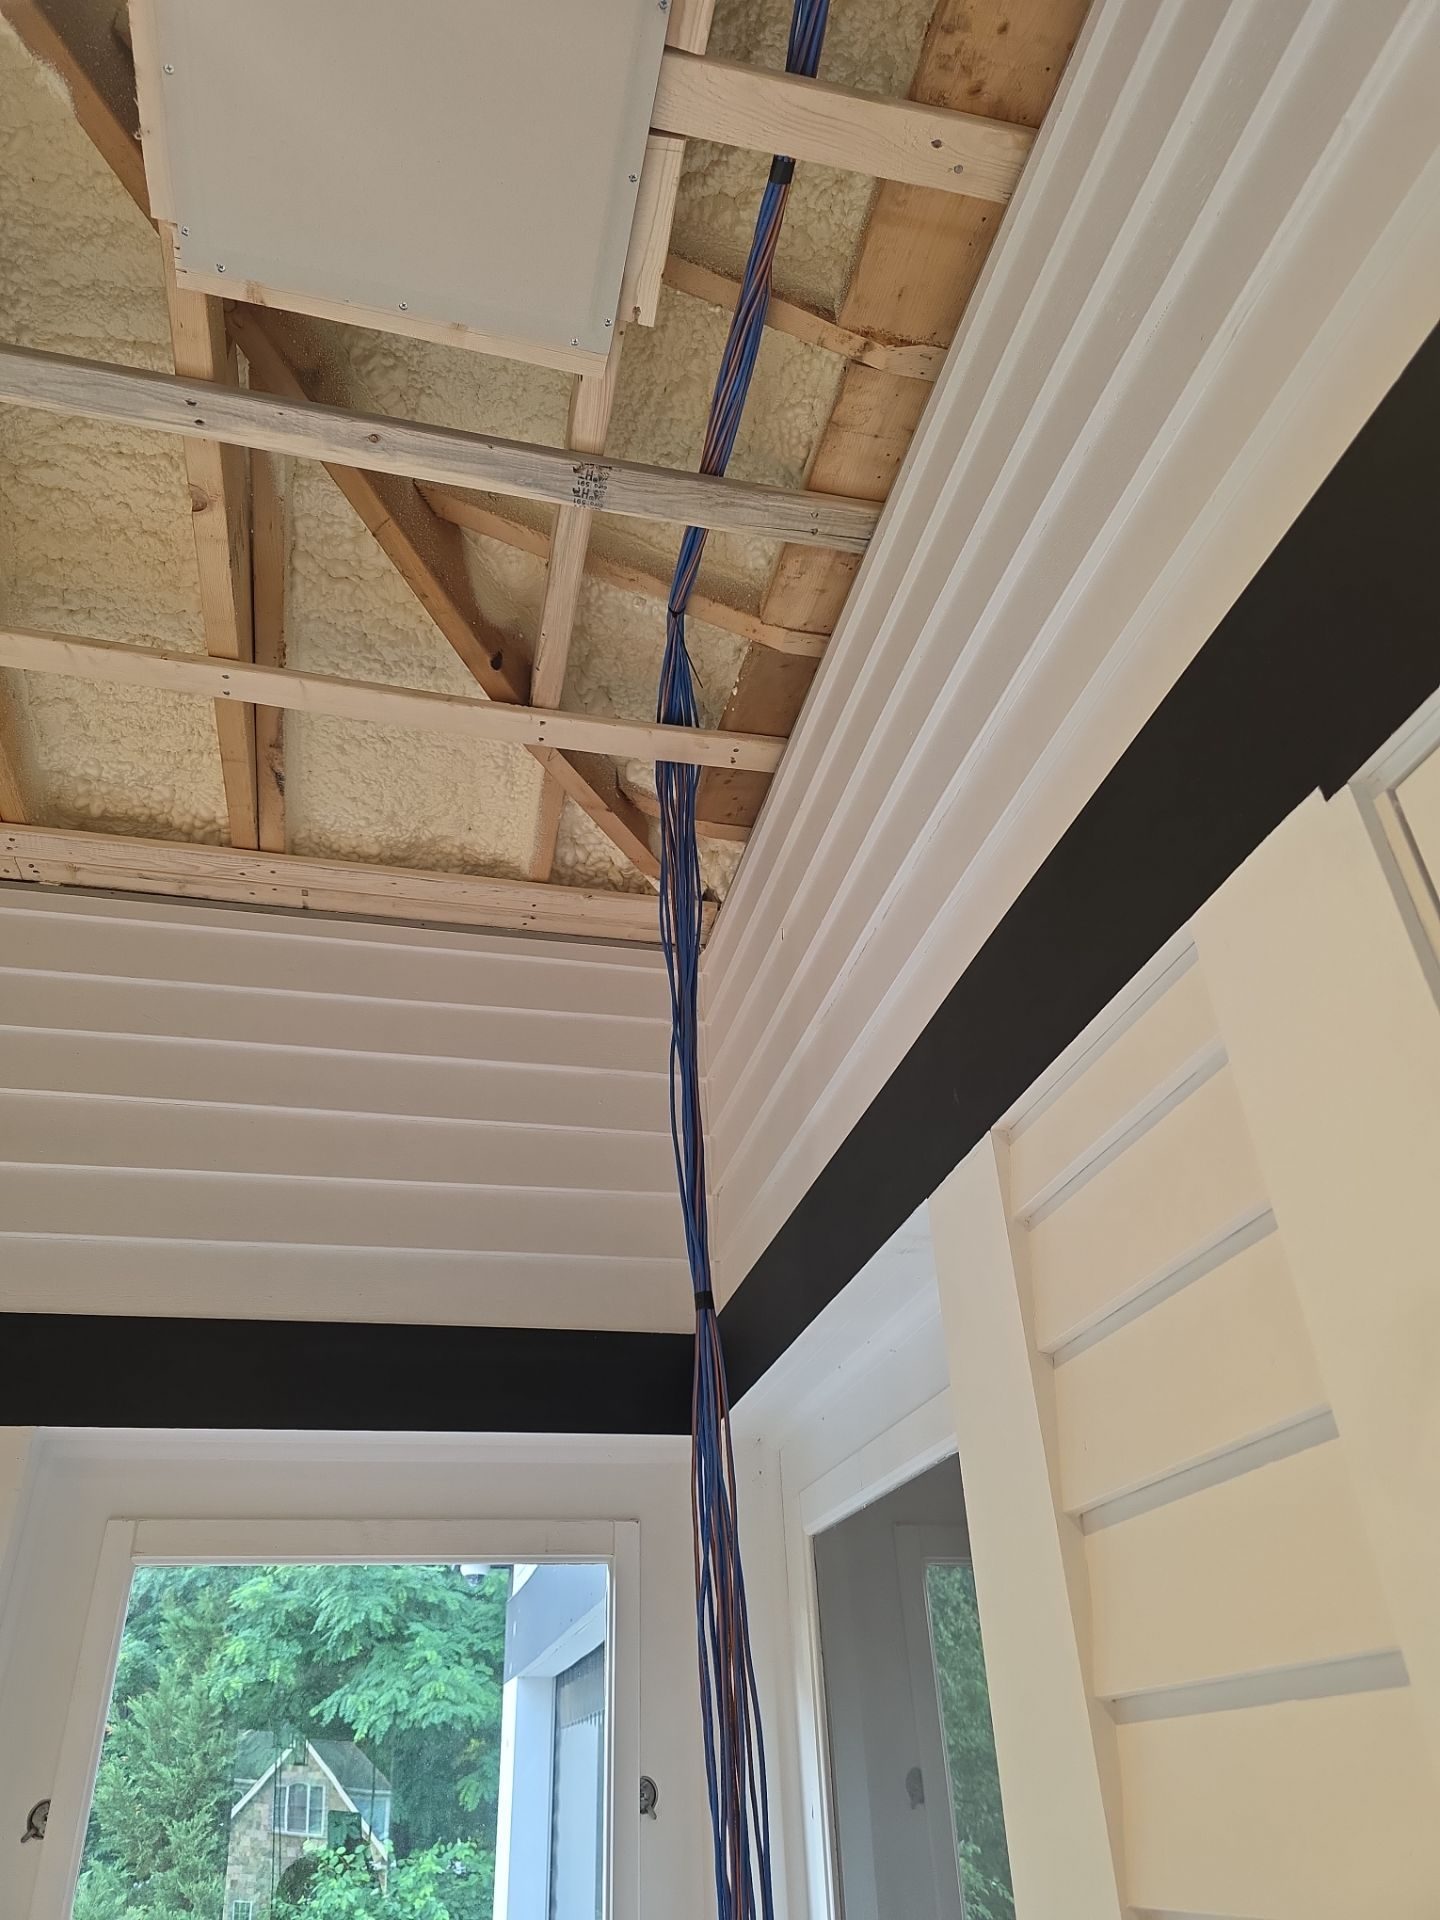
Kina pendant box & the LS0 cove wires
When the ceiling goes up, two penetrations must stay open and accessible for the lighting team to hook up later.
Kina pendant J-box Cut out & expose
There is one round electrical box for the wakaNINE / David Trubridge Kina KIN-0800 pendant. Cut it out so the box and wires are exposed and we can wire up the fixture.
- Located ~90" (7'-6") from the pavilion end wall, on the table centerline (near joist 17). Field-verify to the actual table center.
- 4" round / octagon box on solid blocking at the finished-ceiling plane so the canopy sits flush.
- Cut the blueboard cleanly around the box; leave the wires accessible — do not bury it.
- Fed from the Ketra constant-hot circuit (unswitched 120V). Pendant bottom finishes at 7'-0" AFG.
LS0 cove — 12 orange wires Leave exposed
In the corner closest to the pavilion hang 12 Lutron orange QS/M wires for the Ketra LS0 linear cove lighting — 10 active + 2 spares.
- Leave all 12 wires exposed after the ceiling goes up — do not bury them in the corner.
- Cover them temporarily with a corner piece of trim until the cove is built.
- Once the linear cove is installed, lay the wires inside the cove and connect to the LS0 strips.
- (10) 36" LS0 Uniform-Lens strips run the full length of the north / window wall, set 2" off the wall.
Where everything lands
Viewed from above, north up. West = kitchen slider (entrance); east = pavilion door (exit); north = windows / deck (LS0 cove runs this wall); south = house wall (cabinet, art, all wall-washers). Tap to enlarge.
Fixture & device schedule
| Tag | Fixture | Along-room location | Cross-room | Key note |
|---|---|---|---|---|
| D2-DL1 | Ketra D2 Fixed, 40° flood | 51" from kitchen (bay 3) | Centerline (60") | General light, kitchen end |
| D2-DL2 | Ketra D2 Fixed, 40° flood | 35" from pavilion (323") | Centerline | General light, pavilion end |
| D2-ADJ | Ketra D2 Adjustable, 25° narrow | 143-1/2" (coffee table) | Centerline | Centered; aim straight down |
| WW-1A | Ketra D2 Wall Wash | ~51" from kitchen | 24" off SOUTH wall | Washes cabinet |
| WW-1B | Ketra D2 Wall Wash | ~83" from kitchen | 24" off SOUTH wall | Washes cabinet |
| WW-2A | Ketra D2 Wall Wash | ~211" from kitchen | 24" off SOUTH wall | Washes art wall |
| WW-2B | Ketra D2 Wall Wash | ~243" from kitchen | 24" off SOUTH wall | Washes art wall |
| KINA | David Trubridge Kina KIN-0800 | 90" from pavilion (268") | Over table center | Pendant; J-box here; bottom 7'-0" AFG |
| MAIN-1/2 | Stealth LR430 invisible main ×2 | ~95" from kitchen · 19" from pavilion | Centerline; 1 bay each | Long axis N–S along joists |
| SUB-1/2 | Stealth LR30W invisible sub ×2 | ~131" from kitchen · 51" from pavilion | Centerline; 1 bay each | N–S; parallel-wired pair |
| LS0 ×10 | Ketra LS0 36" Uniform-Lens cove | Full length, NORTH wall | 2" off NORTH wall | 12 orange wires (10 + 2 spare) |
| KP | Lutron Palladiom 4-button keypad | Wall left of slider | 2-gang box | QS-wired; low-voltage |
Pre-plaster verification
Tap each item as you confirm it. Your progress saves on this device. Do not call the plasterer until every box is checked.
Project gallery
The room as it stands today — ceiling strapping, the mounted Ketra D2 housings, and the invisible Stealth speaker panels set between the joists. Tap any photo to enlarge.
Spec sheets & scope of work
Print or download the source documents. The Scope of Work governs; the manufacturer specs back it up.